Begin by removing the Battery from the laptop.
Remove the following screws from the bottom of the laptop. There are 2 different length screws. The image below is labeled L for long screws and S for short screws.

Now remove the bottom cover of the laptop.
Next remove the large screw that holds the left side of the handle assembly. This is right above the word “Panasonic” in white in the above image.
You can now remove the bottom half of the handle retainer and move the handle out of the way.
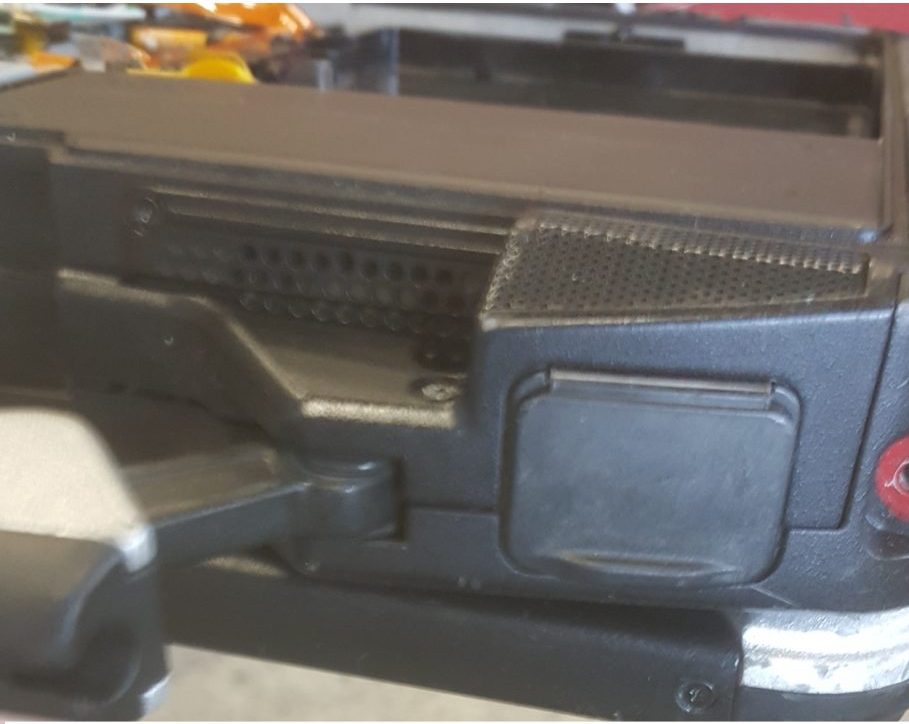
Remove the 4 screws pictured below to remove the speaker cover. You will see where 1 of the 2 handle shims goes.
Now go into the inside of the chassis and remove the plastic cage pictured below. In order to do this you will need to remove the single screw to the left of the cmos battery. You can also unplug the cmos battery from the main board. When removing the plastic cage you will need to slide the plastic assembly slightly towards the main board in order to get the tabs from underneath the mouse board. 
Now you can begin installing the finger print reader. 1st run the finger print cable between the chassis speaker and the plastic speaker mount as shown in the picture below. There is a slight groove the cable runs through so it will not be pinched. You should then be able to put the reader into the chassis recess shown with minimal slack left over. 
Now you can reinstall the speaker grill cover, Assuming its ran correctly.
Take the other half of the finger print wire inside the chassis and plug into the outlet located on the ribbon cable pictured below. Gently pull up on the hinge retainer to open the port. Be sure the blue half of the wire end is rotated towards you. In the picture the wire is fully seated. When you have the wire fully seated push back down on the hinge to lock. If you slightly pull on the cable it should not pull out. 
Now you need to tape the remaining cable along the chassis wall. Regular masking tape is used in this install.

Now you can reinstall the plastic cage and screw that the cmos battery is glued to. Be sure the 2 plastic tabs are going underneath the mouse board as pictured below. Be sure to plug the cmos battery back in too. 
Now you can test fit the battery to make sure it does not rub or catch on the finger print cable. The laptop will auto power on since the cmos has been cleared. Pictured below is what the cable looks like fully taped into place with the battery installed. 
Put the carrying handle back in place and make sure there is a handle shim on each side of the handle pin. Shim pictured below. ![]()
With the handle shims installed you can now install the new handle retainer and screw with the finger print cutout. You can see below the correct rotation of the finger print reader.  You can now flip the computer over and test boot to verify that the finger print reader is seen. The easiest way to verify is by pressing F2 during startup to enter the BIOS. Once in the BIOS use the right arrow key to go over to the Security section. If the finger print reader is seen you will see a option in the security section regarding Finger Print reader. You can now power off the system and put the bottom cover back on. Be sure to install the long and short screws as labeled in the 1st picture of this how-to.
Once completely reassembled you can boot the computer into Windows and do the software side of the installation. Windows 10 will automatically install the device driver. Windows 7 will auto install the drivers assuming you have installed the Panasonic driver pack on a previous occasion.
Here is a link on how to configure Windows 10 to get the most out of your new finger print reader.
https://www.laptopmag.com/articles/set-windows-hello-fingerprint-login
Also a link to purchase a finger print reader kit from us.